Editor’s note before you begin
This guide is about a training image built on Ubuntu 18.04.4. That version is now a legacy release, not the latest Ubuntu Desktop version, and Ubuntu says its standard support ended on May 31, 2023. Publish this post as a learning lab guide, not as a production deployment guide. For live systems, use the official installation methods for each platform.
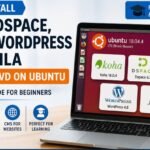
What this training DVD is
This live DVD is a ready made Ubuntu learning environment for Library and Information Science professionals and students. Instead of installing every package one by one, you get a single image that already includes a library system, a repository platform, and two website tools.
That makes it useful for classroom demos, lab practice, and self learning. A student can install one system and explore several major tools without spending hours fixing dependencies first.
What is included in the DVD
According to the package list provided with this custom image, the DVD includes:
| Package | Version in this image | Main purpose | Good for beginners who want to learn |
|---|---|---|---|
| Koha | 18.0.4 | Integrated library system | Cataloging, circulation, patron records |
| DSpace | 6.3 | Digital repository | Theses, papers, institutional content |
| SLiMS | 8.3.1 | Library management system | Fast library workflows and OPAC basics |
| WordPress | 4.8 | Content management system | Library websites, blogs, announcements |
| Joomla | 4.9* | Content management system | Alternative website building practice |
*Use the version exactly as listed in your custom image notes.
Koha is officially documented as a package based install on modern Debian or Ubuntu systems, while DSpace is an open source repository platform and SLiMS is an open source library management system created in Indonesia.
Why beginners may like this setup
If you are new to Linux, the hardest part is usually not learning the software itself. The hardest part is getting Apache, databases, PHP, permissions, and services working together.
This training image removes much of that early friction. You install once, then start learning the tools.
Here is a simple example. A library student can:
- Open Koha and create a sample book record
- Open DSpace and upload a thesis PDF
- Open SLiMS and compare its OPAC workflow
- Open WordPress and build a simple library news page
That is much easier than doing five separate server installations in one weekend.
Who this guide is for
This guide is best for:
- LIS students
- library staff learning open source tools
- trainers running software demonstrations
- beginners testing software in a lab
- anyone who wants a low pressure practice environment
This guide is not best for production servers, public websites, or institutional deployments. For those, follow the official install guides for each application and use currently supported operating system versions.
Before you start
You need a few basics before installation:
- the ISO file
- a USB drive
- a laptop or desktop, or VirtualBox
- time for the download
- backup of any important files if you are installing on a real machine
A USB drive is the better option for most beginners. Ubuntu documents both trying Ubuntu from USB and running it inside VirtualBox. For classroom testing, a virtual machine is often safer because it does not touch your main operating system.
Download the ISO file
Add your Google Drive download button or download box in this section.
Suggested text for the page:
Download the training ISO file from the link provided above. The file is larger than 2 GB, so the download may take time depending on your internet speed. Use a stable internet connection and wait for the download to finish completely before creating the bootable USB.
A practical tip for beginners: after the download finishes, do not move the file around too much. Save it somewhere easy to find, such as your Downloads folder or desktop.
Create a bootable USB
A USB drive is recommended because large ISO files often boot more reliably from USB than from DVD. Ubuntu’s own installation docs focus on creating a bootable USB and then booting from it.
Simple beginner method
- Insert your USB drive
- Open a USB imaging tool such as Rufus or balenaEtcher
- Select the downloaded ISO file
- Select your USB drive
- Start the process
- Wait until the tool finishes writing the image
If you are teaching a class, create one tested USB first before making more copies. That saves time later.
Install the DVD on a laptop or desktop
Once your USB is ready, follow these steps:
Step 1: Boot from USB
Restart your computer and open the boot menu or BIOS settings. Choose the USB drive as the boot device.
Step 2: Start the Ubuntu installer
When the Ubuntu desktop loads, start the installation using the shortcut provided on the desktop.
Step 3: Follow the normal Ubuntu installation steps
This custom image installs in a way that is similar to a normal Ubuntu Desktop installation. Ubuntu’s standard flow includes booting from USB, choosing installation settings, creating a login, and completing setup.
Step 4: Restart after installation
After installation finishes, restart the system and log in to the new Ubuntu setup.
Install it in VirtualBox instead
For many beginners, VirtualBox is the safer choice.
Ubuntu documents VirtualBox as one of the easiest ways to try Ubuntu Desktop on different operating systems. That is helpful if you want to practice Koha or DSpace without changing your main laptop.
When a virtual machine is the better option
Use a VM if:
- your laptop is used for daily work
- you are afraid of partitioning mistakes
- you only want to test the software
- you are a student doing short practice sessions
Simple example
If you are preparing for a class demo, install this image in VirtualBox first. Once it works, you can show Koha, DSpace, SLiMS, WordPress, and Joomla from one safe training environment.
Post installation setup
After Ubuntu finishes installing, do these three tasks.
1. Create the library-koha user
Open Terminal and run:
sudo adduser library-koha
The system will ask for the superuser password. Then set a password for the new library-koha user and fill in the requested details.
2. Start Apache
Run:
sudo service apache2 start
This starts the web server used by the included applications.
3. Change the permission of the Koha config file
Open a new terminal and run:
sudo chmod 755 /etc/koha/conf.xml
This step uses the original instructions provided with the training image. Because this is a classroom style build, keep reminding readers that default settings should be reviewed before any serious deployment.
Open each package after installation
Once services are running, open Firefox or Chrome and use the local addresses below.
| Package | Local address |
|---|---|
| Koha Admin | http://localhost:8088/ |
| Koha OPAC | http://localhost:8089/ |
| DSpace | http://localhost:8080/jspui |
| SLiMS | http://localhost/slims |
| WordPress | http://localhost/wordpress |
| Joomla | http://localhost/joomla |
Default usernames and passwords
| Package | Username | Password |
|---|---|---|
| Koha Admin | librarian | Dsi@2018 |
| Koha OPAC | onlinevws@gmail.com | dsi@2018 |
| DSpace | admin | dsi@2018 |
| SLiMS | admin | Faheem@2018 |
| WordPress | admin | dsi@2018 |
| Joomla | admin | dsi@2018 |
Important safety note
Change all default passwords after your first login. That matters even in a classroom lab, and it matters even more if the machine will stay on a network.
What each package is best for
Beginners often get confused because all of these tools look related. They are not the same.
| Tool | Best use | Quick beginner explanation |
|---|---|---|
| Koha | Library operations | Use it to manage books, members, circulation, fines, and OPAC |
| DSpace | Institutional repository | Use it to store theses, papers, reports, and research output |
| SLiMS | Library catalog and circulation practice | Use it when you want a simpler library workflow |
| WordPress | Library website | Use it for news, blog posts, events, and basic pages |
| Joomla | Structured website building | Use it if you want to compare another CMS with WordPress |
A simple rule helps: Koha and SLiMS manage library collections, DSpace manages digital repository content, and WordPress or Joomla manage websites.
A 30 minute practice lab for students
This is a useful section many install posts miss.
Practice task 1: Koha
Create one sample book record and search for it in OPAC.
Practice task 2: DSpace
Upload one PDF thesis or report and check if the item appears correctly.
Practice task 3: SLiMS
Add one title and compare its cataloging screen with Koha.
Practice task 4: WordPress
Publish one short announcement called “Welcome to Our Library”.
Practice task 5: Joomla
Create one test page and compare how page editing feels compared with WordPress.
This kind of quick lab makes the article more useful than a basic install post.
Common problems and quick fixes
| Problem | Likely cause | Quick fix |
|---|---|---|
| USB does not boot | Boot order is wrong | Enter BIOS or boot menu and select USB first |
| Installer starts but fails later | Bad USB write or incomplete ISO download | Recreate the USB and verify the ISO downloaded fully |
localhost does not open | Apache is not running | Start Apache with sudo service apache2 start |
| Koha page loads badly | Permission or service issue | Recheck the conf.xml permission command |
| System feels slow | Running in a VM with low resources | Shut down unused apps and give the VM more memory if possible |
A practical classroom tip: test the machine once after installation, then create a snapshot if you are using VirtualBox. That way, students can return to a clean state quickly.
Conclusion
This Ubuntu training DVD gives beginners a practical way to explore Koha, DSpace, SLiMS, WordPress, and Joomla in one place.
That is its biggest strength.
It is not the newest stack, and it should not be presented as a production solution. But for classroom practice, software demos, and self learning, it can still save a lot of time.
If you publish this article, the best next step is to build supporting tutorials around each package. That will strengthen your internal linking, improve topical authority, and create more AdSense friendly informational content around library technology.