Introduction
WordPress continues to be one of the most well-liked and widely used Content Management Systems (CMS), Empowering millions of websites throughout the world. cPanel offers a smooth environment for installing WordPress. if you’re new to website creation and want a WordPress website or searching for a hassle-free approach to get your site up and running WordPress. This step-by-step tutorial will show you how to download and install WordPress on cPanel, and suggestions for WordPress optimization.
What is WordPress and cPanel?
WordPress is the world’s most commonly used free and open-source Content Management System (CMS), empowering millions of websites. It is for individuals with no coding experience used for building websites and blogs. While cPanel is a graphical interface (GUI) used as a control panel for managing web hosting and websites. cPanel-based web hosting providers enable WordPress installations. It allows you to publish an entire website, manage domains, organize the data on the website, and many more options. This compatibility provides a trouble-free installation and operation of your WordPress site.
Preparing for Installation
Before you start the installation process, there are a few prerequisites to ensure a successful setup. First, you’ll need to have an active cPanel hosting account and a domain name registered. Additionally, verify that your hosting environment meets the minimum requirements for running WordPress. These requirements typically include PHP, MySQL or MariaDB, and Apache.
WordPress Installation Method-I:
Accessing cPanel: To begin the installation, login to your cPanel account using the credentials provided by your web hosting provider. Once logged in, navigate to the cPanel dashboard, where you’ll find various tools and settings to manage your website.
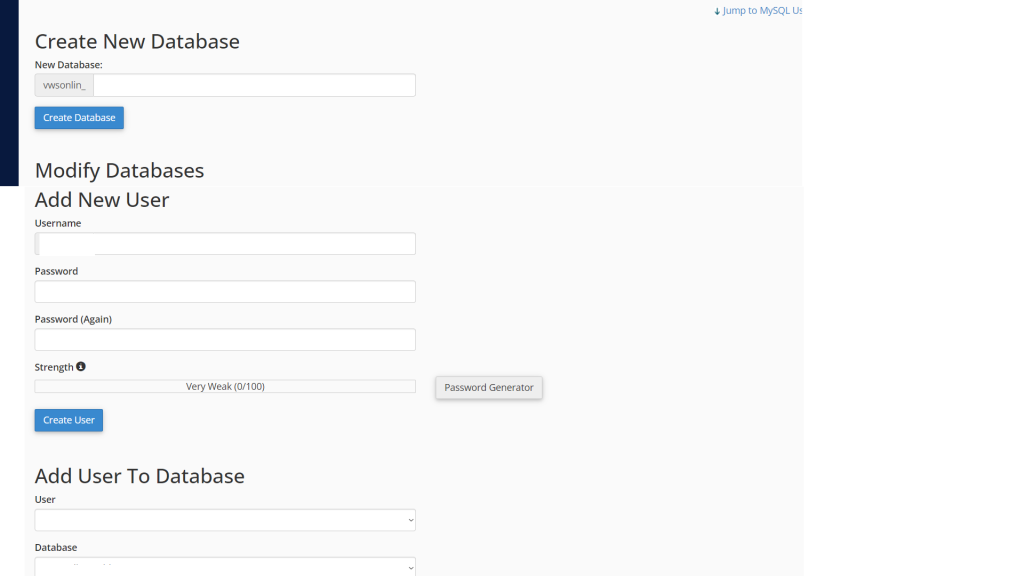
i. Creating a Database
WordPress relies on a database to store your website’s content and settings. To create a new database, locate the “MySQL Databases” icon in cPanel and follow the instructions to set up a new database. Remember to note down the database name, username, and password, as you’ll need them during the installation.
ii. Downloading WordPress
With the database is ready, it’s time to download the latest version of WordPress from the official website(https://wordpress.com). Save the files to your computer.
iii. Uploading WordPress to cPanel
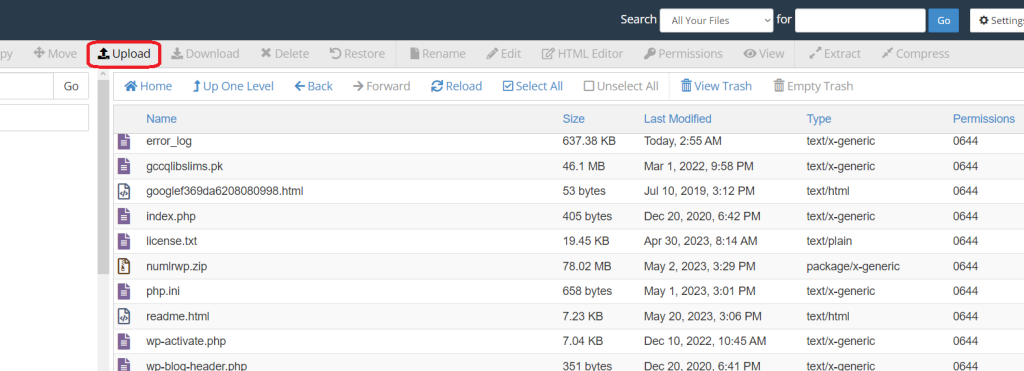
Using an FTP client or cPanel’s File Manager, upload the extracted WordPress files to your hosting account. Ensure the files are placed in the root directory if you want to install WordPress in the main domain or in subdirectory for secoundy domain. In cPanel select() file>File Manager and then select the directory in which you want to upload the file, and click in upload (File uploading will be started).
vi. Installing WordPress
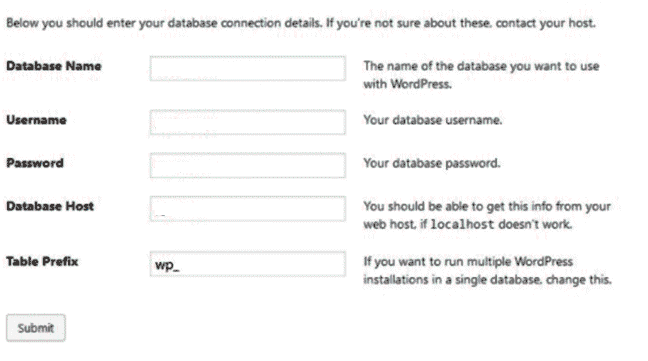
To initiate the installation process, access your website’s domain through a web browser. The WordPress installation wizard will guide you through the setup. Enter the database details you created earlier, and the wizard will establish a connection. After that, provide your site’s title, username, and password to create the administrator account.
Installing WordPress in a Folder
If you want to install WordPress in a subdirectory or folder, create the folder within cPanel’s File Manager or using your FTP client. Follow the standard installation process and provide the folder name when prompted by the wizard.
Method-II: WordPress Installation on cPanel using Softaculous.
An easier way to install WordPress on cPanel is using Softraculous in very simple four steps which are listed below:
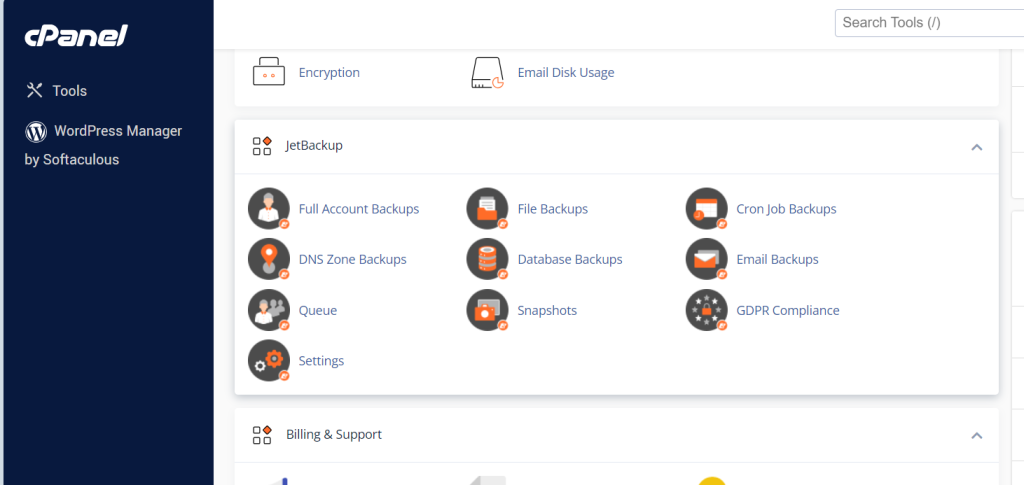
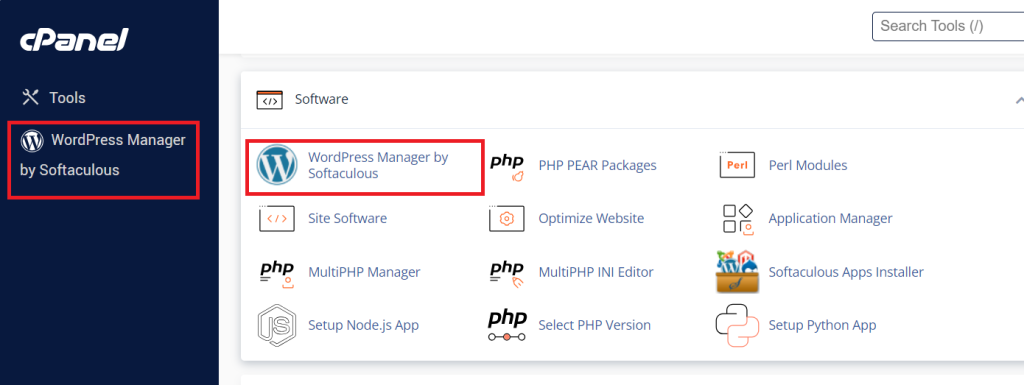
i. In cPanel scroll down to Software and select WordPress Manager by Softaculous ( the same option is also available below tool as shown in the picture)
ii. From the menu that appears, click on “Install”. Next, you have the option to choose a quick install or a custom one. A form will show up, so fill it in. There are some pre-filled default values, you can leave them as they are if you want. you need to specify the Installation URL, meaning the domain where you want to install WordPress.
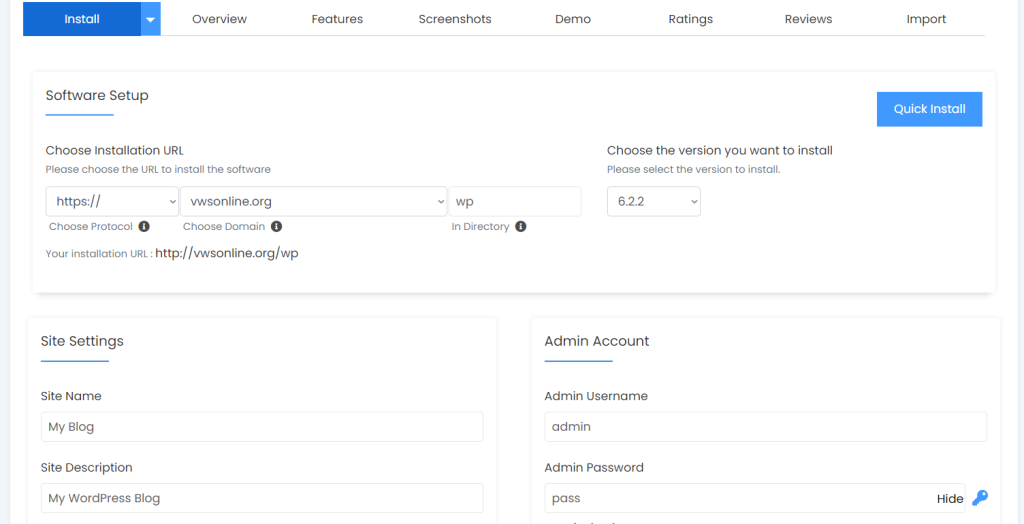
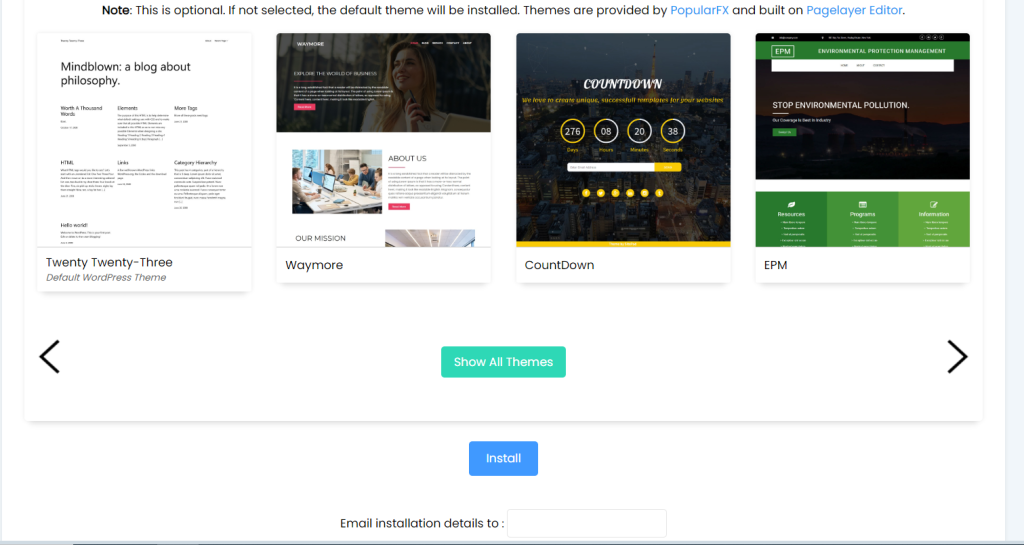
iii. Next, it’s time to fill in the WordPress admin username, password, and email address. Then you must select the language in which you want to install WordPress. Also, select the theme you want to use.
iv. When the form is filled in, just hit “Install” at the bottom of it.
How to login to WordPress Admin Panel?
For customization and making changes in WordPress admin panel is used which be can accessed by http://yourdominname/wp-admin. Enter username and password and enjoy the admin features.
Tips for Optimizing Your WordPress Site on cPanel
Once you’ve successfully installed WordPress on cPanel, it’s time to optimize your website for better search engine rankings and user experience. Here are some essential tips to help you get started:
1. Choose a Responsive Theme: Selecting a responsive WordPress theme ensures your website adapts to different screen sizes, improving mobile user experience—an essential factor for SEO.
2. Install Essential Plugins: Enhance your website’s functionality and performance by installing essential plugins, such as Yoast SEO, W3 Total Cache, and Akismet for spam protection.
3. Create High-Quality Content: Content is king in the world of SEO. Focus on producing valuable, informative, and engaging content that resonates with your target audience.
4. Optimize Meta Tags: Craft compelling meta titles and descriptions for your pages and posts, including relevant keywords to attract clicks from search engine results.
5. Use SEO-Friendly URLs: Keep your URLs short, descriptive, and keyword-rich to make them more appealing to search engines and users alike.
6. Image Optimization: Compress and optimize images before uploading them to your WordPress site. Large images can slow down your site’s loading speed, negatively affecting SEO.
7. Enable SSL: Ensure your website has an SSL certificate installed to secure data transmission and gain a slight SEO boost.
8. Create an XML Sitemap: Generate an XML sitemap using a plugin or a third-party tool and submit it to search engines to help them crawl and index your site effectively.
9. Enable GZIP Compression: Enable GZIP compression through cPanel to reduce the size of your website’s files and speed up page loading times.
10. Monitor Website Performance: Use tools like Google Analytics and Google Search Console to monitor your website’s performance, identify areas for improvement, and track keyword rankings.
Conclusion:
Congratulations! You have successfully installed WordPress on cPanel and optimized your website for better search engine rankings. By following the step-by-step guide and implementing the optimization tips, you’ve set a solid foundation for a successful online presence. Continuously improve your content, user experience, and technical aspects of your site to maintain and improve its search engine visibility. Keep exploring new ways to engage your audience, and don’t forget to promote your content through social media and other marketing channels. With dedication, creativity, and the right SEO practices, your WordPress website on cPanel has the potential to outrank competitors and attract a steady stream of organic traffic. Now, go ahead and create remarkable WordPress website for your brand! Happy WordPressing!
